Transferring a website from one cPanel account to another without root access can be done using the cPanel backup and restore features. Below is a step-by-step guide on how to perform this transfer.
Prerequisites
Before you begin, make sure you have the following:
Access to both cPanel accounts: You will need access to the cPanel accounts on both the source and destination servers.
Backup access: Ensure you have the ability to create backups of the data you want to transfer.
Destination server setup: The destination server should be properly configured and ready to receive the transferred data.
Step 1: Backup the Source cPanel Account
Log in to the Source cPanel Account: Log in to the cPanel account where your website is currently hosted.
reate a Full Backup:
Go to the “Backup” section under the “Files” category.
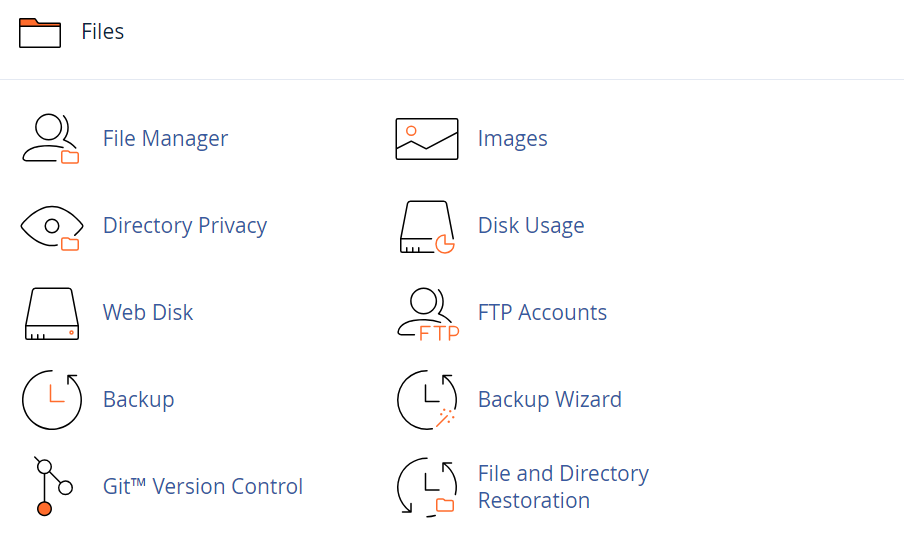
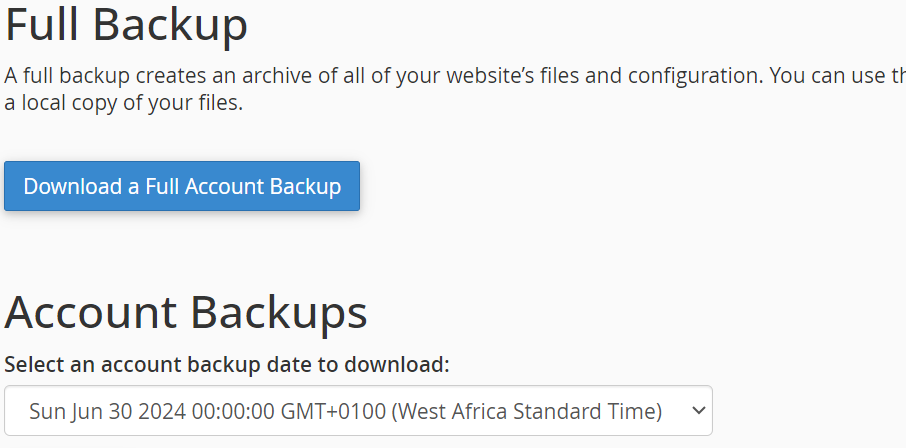
Click on “Download a Full Website Backup”.
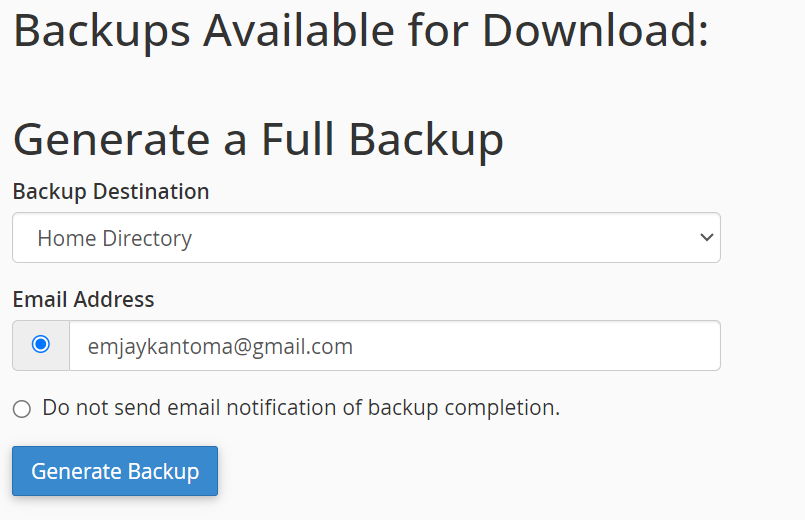
Select “Home Directory” as the backup destination and enter your email address to receive a notification when the backup is complete.
Click “Generate Backup”.
Once the backup is complete, you will receive an email notification. Download the backup file from the link provided in the email or from the “Backups Available for Download” section.
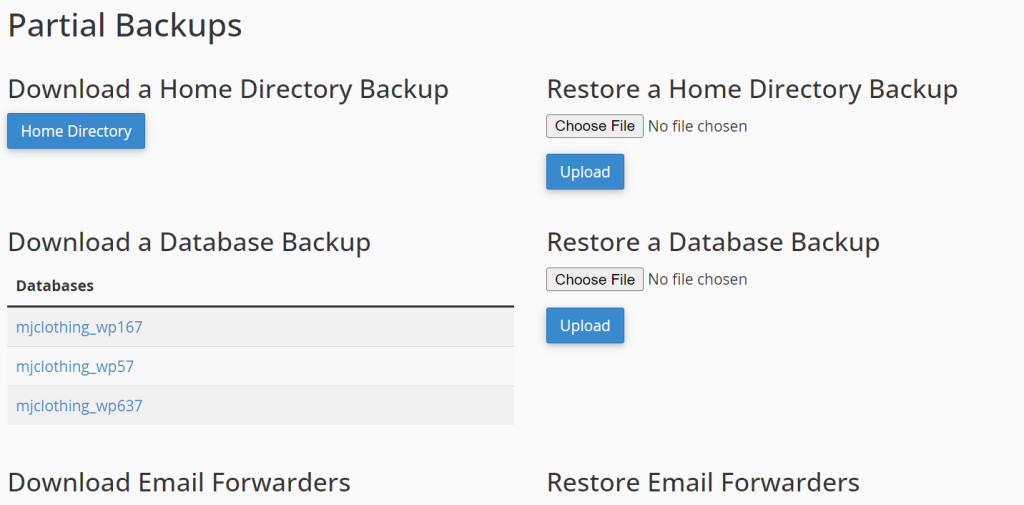
Download Individual Backups (Optional): If you prefer to download specific parts of your cPanel account (e.g., home directory, MySQL databases, email forwarders, email filters), you can do so:
In the “Backup” section, download the “Home Directory” backup.
Download the MySQL database backups by clicking on each database name under the “Download a MySQL Database Backup” section.
Download email forwarders and filters if needed.
Step 2: Upload Backup to Destination cPanel Account
Log in to the Destination cPanel Account: Log in to the cPanel account where you want to transfer your website.
Upload Full Backup:
Go to the “File Manager” under the “Files” category.
Navigate to the “home” directory or any directory where you have sufficient space and permission to upload files.
Click on the “Upload” button and upload the full backup file you downloaded from the source cPanel.

Extract the Backup:
Once the backup file is uploaded, select the file and click “Extract” to unzip the backup file.
The contents of the backup will be extracted to a directory, usually named after the backup file.
Step 3: Restore the Backup in the Destination cPanel Account
Restore Home Directory Files:
Move the extracted files from the backup directory to the home directory or the appropriate directory where your website files should reside.
Restore MySQL Databases:
Go to the “MySQL Databases” section under the “Databases” category.
Create new databases and database users, ensuring they match the names and credentials used in the source cPanel account.
Go to the “phpMyAdmin” section under the “Databases” category.
Select the newly created database and use the “Import” feature to import the SQL files from the backup.
Restore Email Accounts:
Go to the “Email Accounts” section under the “Email” category.
Recreate the email accounts as they were in the source cPanel.
If you downloaded email forwarders and filters, you can restore them in the “Email Forwarders” and “Email Filters” sections respectively.
Step 4: Update Configuration Files
Update Configuration Files:
If your website uses configuration files (e.g., wp-config.php for WordPress, config.php for other CMSs), ensure that they are updated with the new database names, usernames, and passwords.
Step 5: Test the Website
Test the Website:
Before pointing the DNS to the new server, use a temporary URL or modify your local hosts file to test the website and ensure everything is working correctly.
Fix any issues that arise during the testing phase.
Step 6: Update DNS Records
Update DNS Records:
Once you’ve confirmed that the website is functioning correctly, update the DNS records to point to the new server’s IP address.
This can be done through your domain registrar’s control panel.
Step 7: Monitor the Website
Monitor the Website:
After the DNS changes propagate (which can take up to 48 hours), monitor the website to ensure everything is working as expected.
Check emails, database connections, and website functionalities.
By following these steps, you can successfully transfer your website from one cPanel account to another without root access. Ensure that you carefully follow each step and consider any additional configurations specific to your website or hosting environment.
