PHP directives control how your server handles key aspects of your website or application from file uploads and memory usage to session handling and time limits. If you are running a WordPress site, Laravel app, or any PHP-based platform, you may eventually need to customize these settings for better performance or compatibility.
In this guide, you will learn how to easily customize PHP directives using cPanel — no coding or server-side programming needed!
What Are PHP Directives?
PHP directives are configuration settings that dictate how PHP functions on your server. These settings can control things like:
upload_max_filesize – Maximum size for file uploads
post_max_size – Max size of POST data
max_execution_time – Time a script is allowed to run
memory_limit – Max memory allocated for scripts
display_errors – Whether to show errors in the browser
These directives are usually stored in a file called php.ini, but many hosting environments especially shared hosting allow you to change them through cPanel.
How to Customize PHP Directives in cPanel
Step 1: Log in to cPanel
Go to your hosting control panel
Enter your username and password to access your cPanel dashboard.
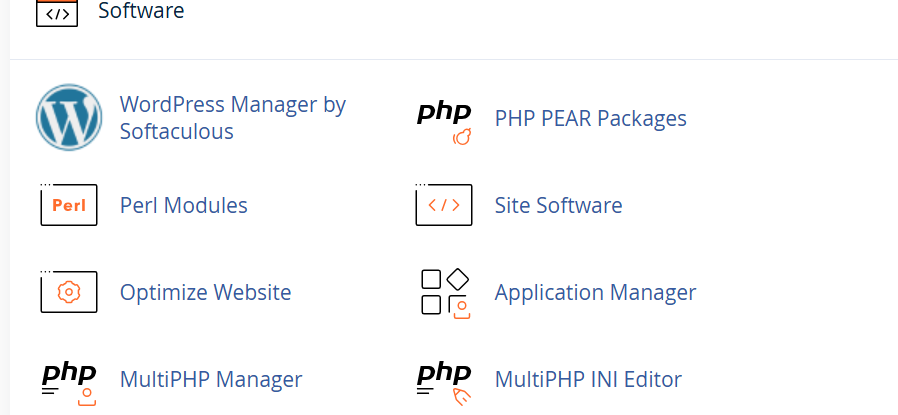
Step 2: Open the MultiPHP INI Editor
Scroll down to the “Software” section.
Click on “MultiPHP INI Editor.”

Step 3: Select the Domain
From the dropdown menu, select the domain for which you want to customize PHP directives.
This loads the current PHP configuration for that domain.
Step 4: Modify the PHP Settings
Scroll down to the list of commonly used directives. Here are a few you might want to adjust:
Directive | Default | Recommended Change |
memory_limit | 128M | 256M or higher for large apps |
upload_max_filesize | 2M | 64M or 100M for media-heavy sites |
post_max_size | 8M | Slightly more than upload_max_filesize |
max_execution_time | 30 | 120 or more for long scripts |
display_errors | Off | On (for development only) |
Simply change the values in the input fields next to each directive.
Step 5: Save Your Changes
Once you have made the desired changes, scroll to the bottom of the page and click “Apply” or “Save.”
The changes take effect immediately for most hosts,
Alternative Methods (Advanced Users)
If your host does not support the MultiPHP INI Editor, you can modify PHP directives using:
.htaccess file (for Apache servers)

php.ini file (if custom PHP is allowed)

user.ini (for suPHP environments)

Check with your hosting provider to know which method is supported.
Important Tips
Never set memory or file size limits too high unless necessary this can strain server resources.
Use display_errors = Off in production environments to prevent exposing sensitive information.
Changes to PHP directives apply only to the domain or directory selected.
Some directives may be restricted on shared hosting.
Customizing PHP directives allows you to tailor your hosting environment to fit your site’s needs whether it’s increasing upload size for a WordPress media library or extending script execution time for a custom application.
With cPanel’s MultiPHP INI Editor, even non-technical users can easily manage these settings in a few clicks.
