Domain Parking is a feature in the cPanel that allows you to add and manage redirection of a unique registered domain name. By using domain parking you can add a domain to your park domains and easily redirect it to a desired URL/website.
For example, a systems administrator can park the smartweb.com.ng domain on the smartweb.net.ng domain. When users visit smartweb.com.ng in a web browser, the system will display the contents of smartweb.net.ng domain. However, the browser’s address bar will display smartweb.com.ng domain.
It is important to note that a parked domain is just a name to which you cannot use to create custom emails or to create an independent website. Also a domain can only be parked if it is having the same name-servers as that of your hosting plan in which you are going to park it.
After propagation of the name-servers, there are some steps by following which you can easily add a registered domain in your cPanel
Follow the Guide to Set Up a Parked Domain
Step 1
Register a Domain
The process of securing a domain works much the same regardless of which host or registrar you use. All you have to do is select an available domain name and TLD, and pay for the registration:
Step 2
Update the nameservers:
For this to work the parked domain’s DNS servers are to be set to the same as the master’s domain’s.
The following steps are to be taken in other to create a Parked domain in your cPanel hosting account.
Log in to cPanel: Access your hosting account and open your cPanel dashboard.
Under Domains, click Domains.
3. Click Create a New Domain
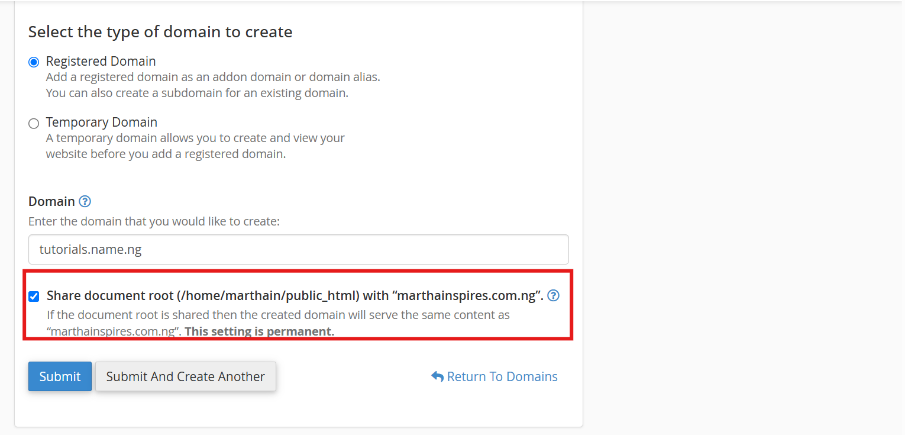
4. Enter your domain and make sure to share the document root on the next page before clicking Submit.
You will then see a message stating: “The parked domain tutorial.name.ng has been successfully created for you.”