When managing a web server, especially one running multiple websites or applications, encountering the “PHP Fatal error: Allowed memory size” error is common. This error occurs when a PHP script exceeds the memory limit allocated to it, which is defined by the memory_limit directive in the php.ini file. Addressing this error from WHM (Web Host Manager) involves adjusting the PHP memory limit and ensuring the changes take effect across all relevant domains and applications.
Understanding the Error
The error message typically looks like this:
PHP Fatal error: Allowed memory size of X bytes exhausted (tried to allocate Y bytes)
Here, X represents the current memory limit, and Y represents the additional memory the script attempted to use.
Steps to Correct the Error from WHM
- Access WHM
Log into your WHM interface using your administrator credentials.
- Navigate to PHP Configuration Editor
- Search for “PHP Configuration Editor”:
– In the WHM search bar, type “PHP Configuration Editor”.
– Click on “PHP Configuration Editor” under the “Service Configuration” section.
- Basic Mode vs. Advanced Mode:
– WHM offers two modes for editing PHP settings: Basic and Advanced.
– For most users, the Basic Mode is sufficient. If you need more detailed configuration options, switch to Advanced Mode.
- Increase the Memory Limit
- In Basic Mode:
– Scroll down to find the memory_limit directive.
– Increase the value according to your needs. Common values are 128M, 256M, or higher, depending on the application’s requirements.
Example:
plaintext
memory_limit = 256M
- In Advanced Mode:
– Locate the memory_limit directive in the list.
– Change its value to a higher limit.
Example:
ini
memory_limit = 256M
- Save Changes:
– After making the changes, click on the “Save” button to apply the new configuration.
- Apply Changes to All PHP Versions
If your server hosts multiple PHP versions, you need to ensure that the memory limit is increased for all PHP versions in use:
- MultiPHP INI Editor:
– In WHM, search for “MultiPHP INI Editor”.
– Select the PHP version you want to configure from the drop-down menu.
- Update Memory Limit:
– Locate the memory_limit directive.
– Increase the value as required.
– Save the changes.
Repeat this for each PHP version that is active on your server.
- Adjust Memory Limit for Specific Domains
If only specific domains require a higher memory limit, you can adjust their settings individually:
- MultiPHP INI Editor – Editor Mode:
– In WHM, search for “MultiPHP INI Editor” and select “Editor Mode”.
– Choose the domain you want to configure.
- Set Memory Limit:
– Add or modify the memory_limit directive for the selected domain.
– Save the changes.
Example:
ini
memory_limit = 256M
- Using .htaccess to Override PHP Settings
For individual sites, you can also override PHP settings using an .htaccess file if your server configuration allows it:
- Edit .htaccess File:
– Navigate to the root directory of the website.
– Open or create the .htaccess file.
- Add PHP Value:
– Add the following line to increase the memory limit:
apache
php_value memory_limit 256M
- Save Changes:
– Save the .htaccess file.
- Restart Apache and PHP-FPM
After making changes to PHP configuration files, it’s often necessary to restart the Apache and PHP-FPM services to apply the new settings:
- Restart Apache:
– In WHM, go to “Restart Services”.
– Select “HTTP Server (Apache)” and click “Yes” to restart.
- Restart PHP-FPM:
– If you use PHP-FPM, restart the PHP-FPM service for the changes to take effect.
sudo systemctl restart php-fpm
- Verify the Changes
To ensure the changes have been applied correctly:
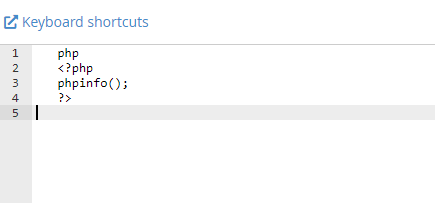
- Create a PHP Info File:
– Create a phpinfo.php file in the root directory of the domain:
php
<?php
phpinfo();
?>

- Access the PHP Info File:
– Open a web browser and navigate to http://your-domain/phpinfo.php.
– Look for the memory_limit directive to confirm the new value.
- Delete the PHP Info File:
– For security reasons, delete the phpinfo.php file after verification:
rm /path/to/phpinfo.php
Additional Considerations
– Monitor Resource Usage: Increasing the memory limit can help resolve errors, but it may also lead to higher memory usage on your server. Monitor your server’s resource usage to ensure it can handle the new configuration without performance issues.
– Script Optimization: Sometimes, high memory usage is due to inefficient scripts. Consider reviewing and optimizing your PHP code to use memory more efficiently.
– Regular Updates: Keep your PHP versions and associated modules up to date to benefit from performance improvements and security patches.
By following these steps, you can effectively correct “PHP Fatal error: Allowed memory size” errors from WHM, ensuring that your PHP scripts have the necessary memory to function correctly while maintaining optimal server performance.
