
Efficient and secure payment handling is fundamental in managing your web hosting services. Smart Web’s Client Area offers a user-friendly platform where you can easily manage invoices and funds through various payment methods. In this comprehensive guide, we’ll walk you through the step-by-step process of making payments for invoices and funding your EWallet within the Smart Web Client Area.
Understanding Invoice Payments and EWallet Funding: Invoice payments involve settling outstanding bills for services rendered by Smart Web, while funding your EWallet allows you to maintain a balance within your account for smoother and quicker transactions, subscriptions, or recurring payments, that’s renewals.
Following steps will guide you to make payment for invoice(s) via your client area with smartweb:
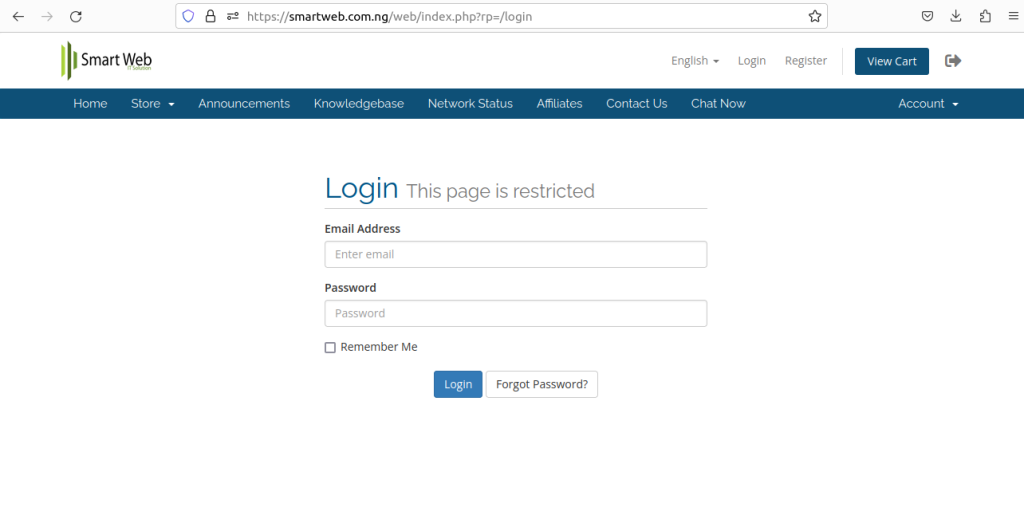
Login to Your Client Area with Smartweb Nig. Ltd.:
Visit the link https://smartweb.com.ng/ and click on Client Login. Enter your credentials and login.
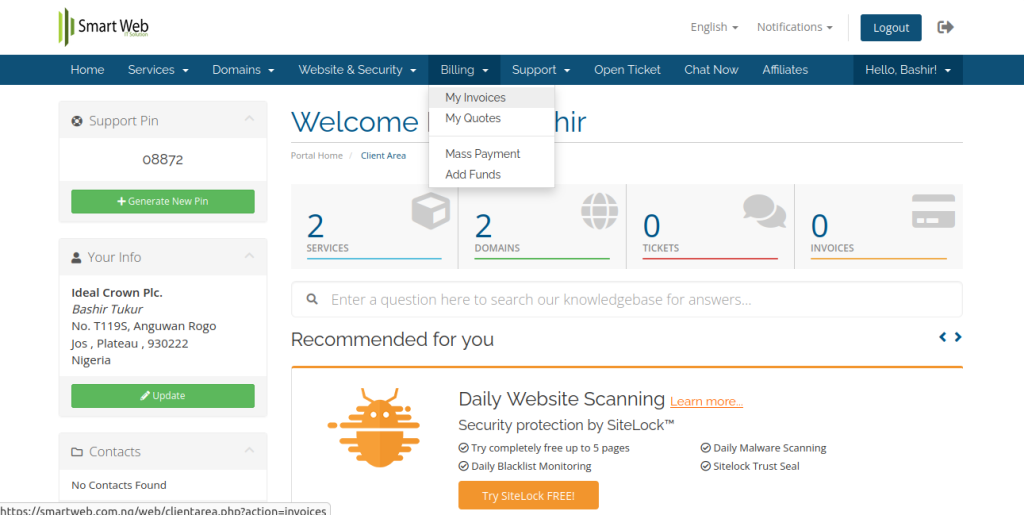
2. Navigate to Billing and Click on My Invoices:
- Locate a section named “Billing” in the menu items and Select “My Invoices”.
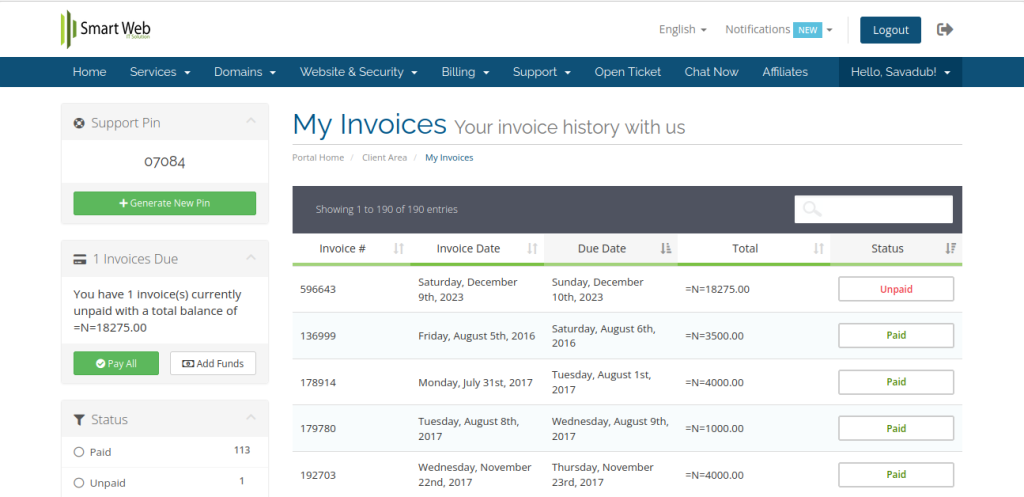
3. View Unpaid Invoices:
Locate the desired invoice to be paid and click on it corresponding ID e.g. #11111 or #22222 e.t.c.
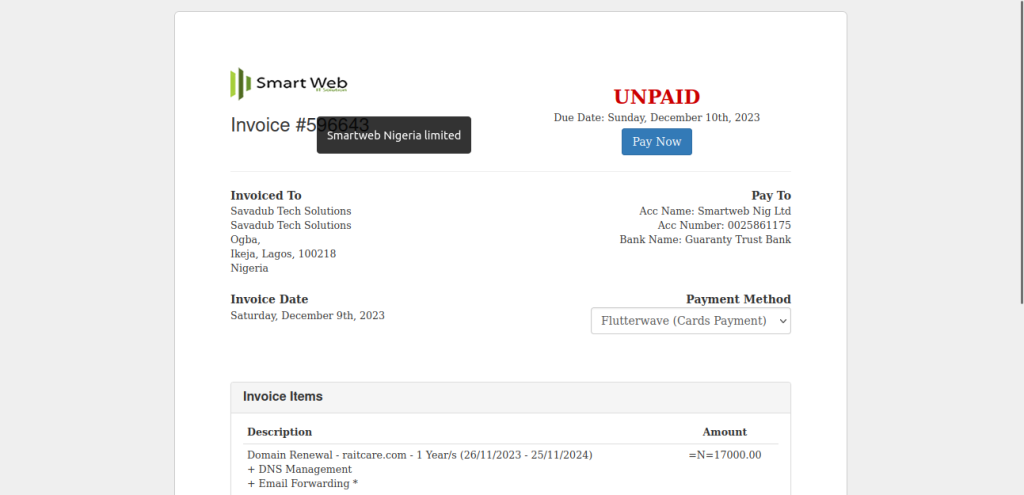
4. Select Payment Method:
Choose your preferred payment method. This include Paystack or Flutterwave and enter your credit/debit cards detail.
5. Verify Payment:
After making the payment, verify that the invoice is marked as paid in your client area.
Funding Your E-Wallet on Your Smartweb Client Area:
Login to Your Client Area with Smartweb Nig. Ltd.:
- Visit the link https://smartweb.com.ng/ and click on Client Login. Enter your credentials and login.
Navigate to Billing and Click on “Add Funds”:
Enter the amount you want to add to your e-wallet.
Choose Payment Method:
Choose your preferred payment method for adding funds. This include Paystack or Flutterwave.
Complete Transaction:
Follow the prompts to complete the transaction and add funds to your e-wallet.
Verify Balance:
After the transaction, verify that your e-wallet balance has been updated accordingly.
Managing payments for invoices and funding your EWallet within the Smart Web Client Area is a straightforward process designed to offer convenience and security to users. By following these step-by-step instructions, you can easily settle invoices and maintain a sufficient balance in your EWallet for hassle-free transactions and services.
Should you encounter any issues or require further assistance during the payment process or EWallet funding, Smart Web’s support team is readily available to provide guidance and resolve any queries you may have.
With the simplified payment system in the Smart Web Client Area, managing your web hosting services becomes seamless, allowing you to focus on your online ventures with ease and confidence.
